

Control Credit Application Process from Salesforce
Follow the steps described below to embed a Visualforce page onto a Contact or Lead object in your Salesforce instance that has the ability to:- Draft a Credit Application using the UGA Finance Program.
- View the current process of the newly created application.
- Send application email link to the consumer.
- Automatically Login to uPortal360 to manage items:
- Resolve pending issue.
- Update email address.
- Update application information.
- View Consumer Account at anytime after Origination
Demonstration
-
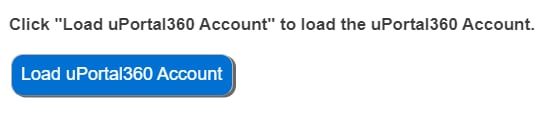
Load uPortal360 Account Button
-
Click this button to load this Contact or Lead’s Customer Account information. The following steps will show the different scenarios that loading the uPortal360 Account can result in.
-
Click this button to load this Contact or Lead’s Customer Account information. The following steps will show the different scenarios that loading the uPortal360 Account can result in.
-
Draft Credit Application Button
- After clicking “Load uPortal360 Account”, no information will be displayed as the Credit Application does not exist yet.
- “Draft Credit Application” will use information from the Contact or Lead record and pass to uPortal360 to create a new Credit Application.
-
Once the draft Credit Application is created, an application email will automatically send to the consumer.

-
View Record Summary
-
You can view the record summary after the Credit Application created.
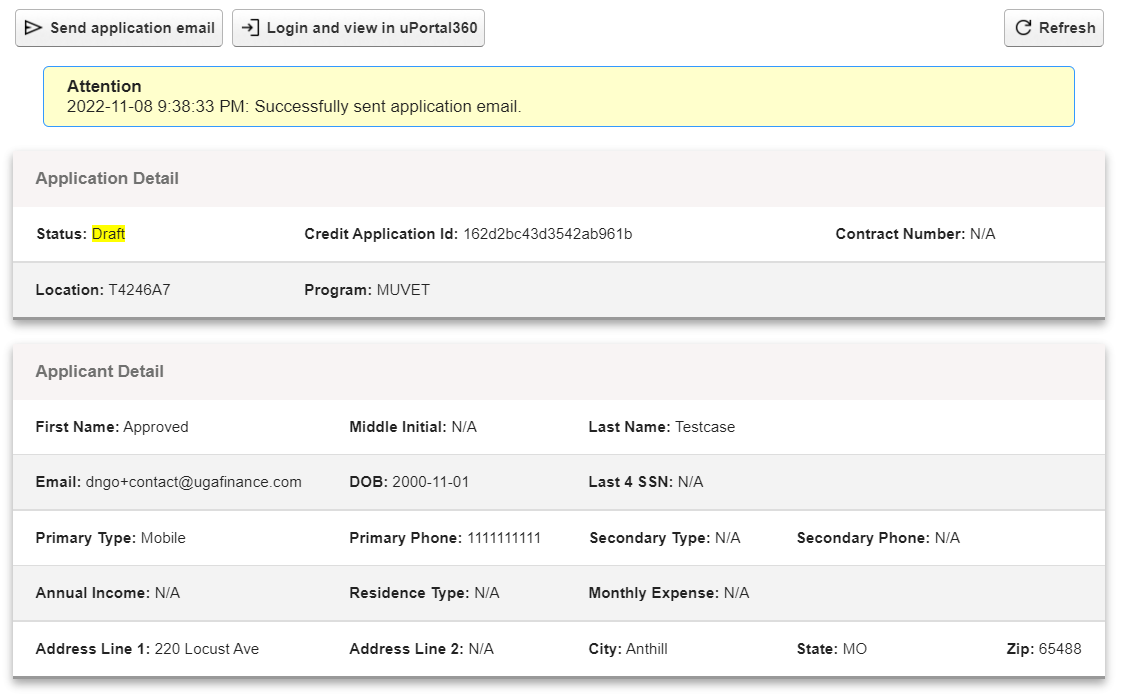
- You can resend email when the application is not submitted.
-
You can view the record summary after the Credit Application created.
- The button “Login and view in uPortal360” will launch you into uPortal360 and allow you make modification to the draft credit application.
- Refresh Record Summary
- You can manually refresh to get the latest record summary.
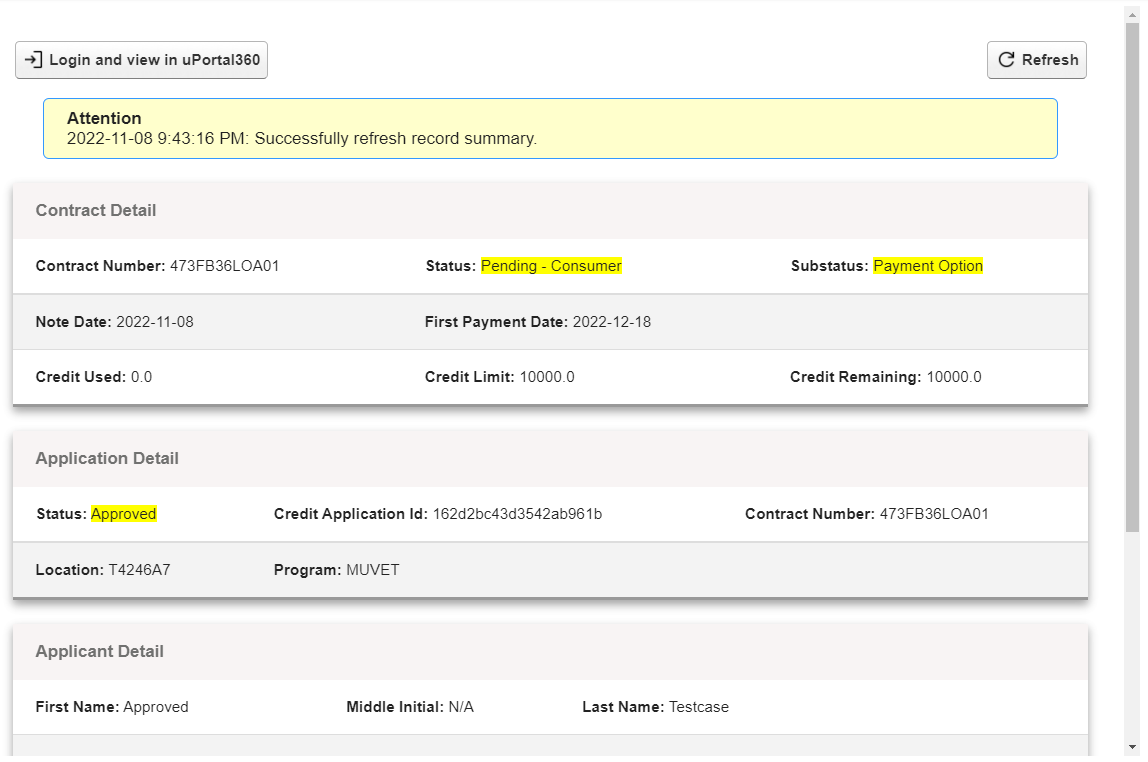
- You can manually refresh to get the latest record summary.
Implementation Steps
- To implement the embedded Visualforce page in your instance of Salesforce, you must be a Salesforce Administrator. The guide below assumes some familiarity with Salesforce and creating fields and deploying code.
NoteImplementation should be in Lightning Experience.
Create Custom Fields
-
Create a custom Contact or Lead Field
- Setup > Object Manager
- Find “Contacts” or “Leads” object.
- Select “Fields & Relationships”
-
Create new custom fields below:
Deprecation and Migration
UAS_Account_Number are deprecated and replaced by UAS_Contract_Number. Please append LOA01 to the old data from UAS_Account_Number and data migrate into UAS_Contract_Number.Create Custom Setting
-
Create a Custom Setting
- Setup > Custom Setting
-
Create new custom fields below:
Deprecation and Migration
uPortal360_Credentials are deprecated and replaced by your Salesforce user email address. Please contact UAS to make sure the email address of your user is up to date with our system.-
In the newly created “UAS uPortal360 Settings” custom setting
- Select the custom setting you created.
-
Create new custom field(s) below:
- Once new field(s) created, click on “Manage” button.
- Click on “New” button.
-
Create new uPortal360 settings below:
Add Remote Site Access
- Setup > Remote Site Settings
- Click on “New Remote Site” button.
-
Create new remote sites below:
Deprecation and MigrationPrevious remote sites are deprecated and should be replaced with the new remote sites above.
Add Auth Provider
- Setup > Auth Provider
- Click on “New” button.
-
Create new auth providers below:
- Provider Type: Open ID Connect
- Name: Keycloak
- URL Suffix: Keycloak
- Consumer Key: Contact UAS to receive a consumer key.
- Consumer Secret: Contact UAS to receive a consumer key.
- Authorize Endpoint URL:
- Token Endpoint URL:
- User Info Endpoint URL:
- Default Scopes:
openid offline_access - Send access token in header: true/checked
- Include Consumer Secret in SOAP API Responses: true/checked
Configure Permission Set for External Credential
- Setup > Permission Sets
- Create a new permission set or select an existing permission set to have permission to use the integration.
- Click on “Object Settings”.
- Click on “User External Credentials”.
- Click on “Edit” button and assign the permissions you want.
- Must have “Read” enabled
- Save the settings.
- Setup > Users
- Search for user that you would like to have access to External Credential
- Select the user.
- Scroll down till you reach “Permission Set Assignments” and click on “Edit Assignments” button.
- Add the permission set you configured.
Add External Credential and Named Credential
- Setup > Named Credential
- Select “External Credentials” upper tab/menu.
- Click on “New” button.
-
Create new external credentials below:
- Select the external credential you created.
- Click on “New” button under the “Permission Set Mappings”.
-
Create new permission set mapping below:
- Once permission set mapping is created, on the “Actions” columns of the permission set mapping, click on “Authenticate”.
- You will redirect to the Auth provider site to authenticate.
NoteContact UAS to receive login credential.
- Head back to the main named credential page or Select “Named Credentials” upper tab/menu.
- Click on “New” button.
-
Create new named credentials below:
Add Apex Class
- Setup > Apex Classes
- Click on “New” button To create a new Class.
- Copy/Paste Code:
- Click on “Save” button once done.
- (Optional) Click on “Run All Tests” button to validate APEX classes.
Add Visualforce Page
- Setup > Visualforce Pages
- Click on “New” button To create a new Page.
- Copy/Paste Code:
- Choose the Code corresponding to the object you would like to embed the page on Contact or Lead.
Embedding Visualforce Page in Page Layouts
- Setup > Object Manager
- Choose Contact or Lead.
- Select “Page Layouts”.
- Choose available page layout user has access to.
- Drag a new section into page layout.
- On the layout menu, select “Visualforce Pages”.
- Drag the Visualforce Page from the list to new section.
- Click on “Save” button to finalize.
Run a Test
-
Use following testcase information:
-
Fill out the following fields:
-
Contact
First NameLast NameMailing StreetMailing CityMailing StateMailing Postal CodeEmail- (For testing) Recommended to use an email address that you have access to.
Phone Number- Any of the following standard phone number fields can be filled out. The first one filled out in the order below will be considered the “primary number”.
Mobile PhoneHome PhonePhoneOther Phone
- Any of the following standard phone number fields can be filled out. The first one filled out in the order below will be considered the “primary number”.
-
Lead
First NameLast NameStreetCityStatePostal CodeEmail- (For testing) Recommended to use an email address that you have access to.
Phone Number- Any of the following standard phone number fields can be filled out. The first one filled out in the order below will be considered the “primary number”.
Mobile PhonePhone
- Any of the following standard phone number fields can be filled out. The first one filled out in the order below will be considered the “primary number”.
-
Contact
- Click on “Load uPortal360 Account” button.
- Click on “Draft Credit Application” button.
-
Use the link you receive from the email. The link will redirect you to our Apply Interface portal.
- In production, the consumer will use the email link and continue the application process in the Apply Interface portal.
- You may use the “Send application email” button to send another application email.
- Once you submit the application in the Apply Interface portal, you may use the “Refresh” button to get the latest data.
Post Migration
AttentionThis is only applicable if you leveraged an older version of the UGA Finance program with Salesforce. Only perform the actions below once migration step are completed.
- You may delete the
UAS_Account_Numberfield once you have data migrate toUAS_Contract_Number. - You may delete the
uPortal360_Credentialscustom setting once you have migrate to use your Salesforce user email address. - You may delete previous remote site access once the new remote site access are implemented.