uPortal360 Add Charge Guide
This article is meant to serve as a guide in navigating through uPortal360 and submitting an Add Charge. Instructions and examples will be provided for both consumers and merchants.When can an Add Charge be submitted?
In order to submit a change for an Add Charge, the consumer’s account must meet the following criteria:- Account is Active
- Closed Accounts or Accounts with a Pending application status cannot request an Add Charge
- Account is Current
- If the account is delinquent, the request cannot be submitted until the consumer has brought it current
- Account has Credit Available
- If the max amount of credit is used, an Add Charge cannot be submitted.
Merchant Adds Charge for Consumer
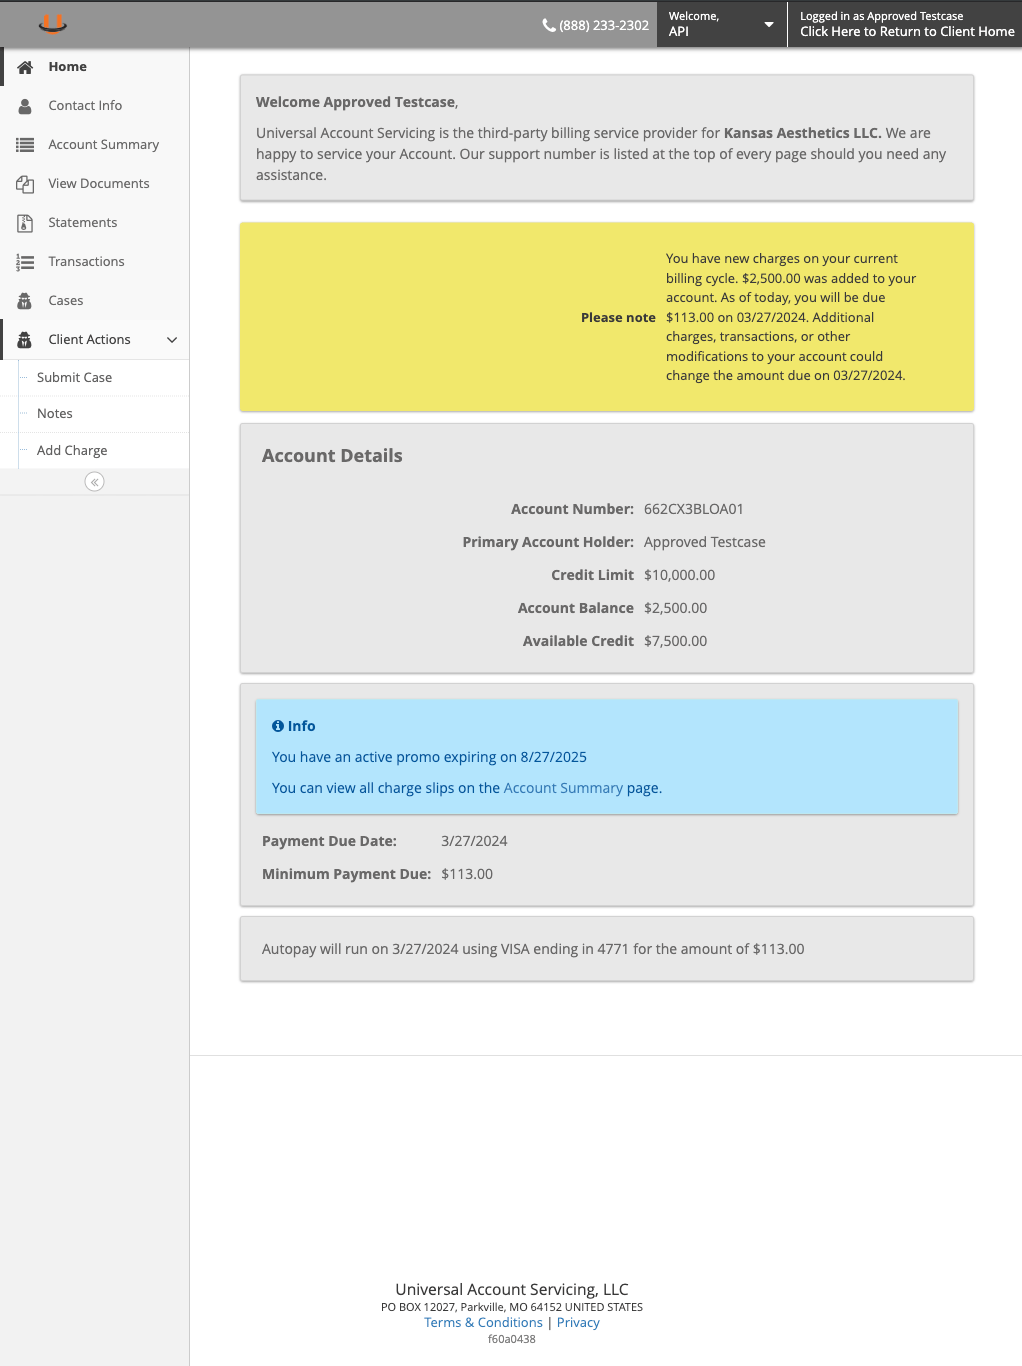
To Add additional charges to a Consumer’s account, the merchant must access the account via uPortal360. Once the Merchant is in the account, they will navigate the process through the portal using the Add Charge feature located within the Client Actions tab of the sidebar.1
Click Client Actions > Add Charge
2
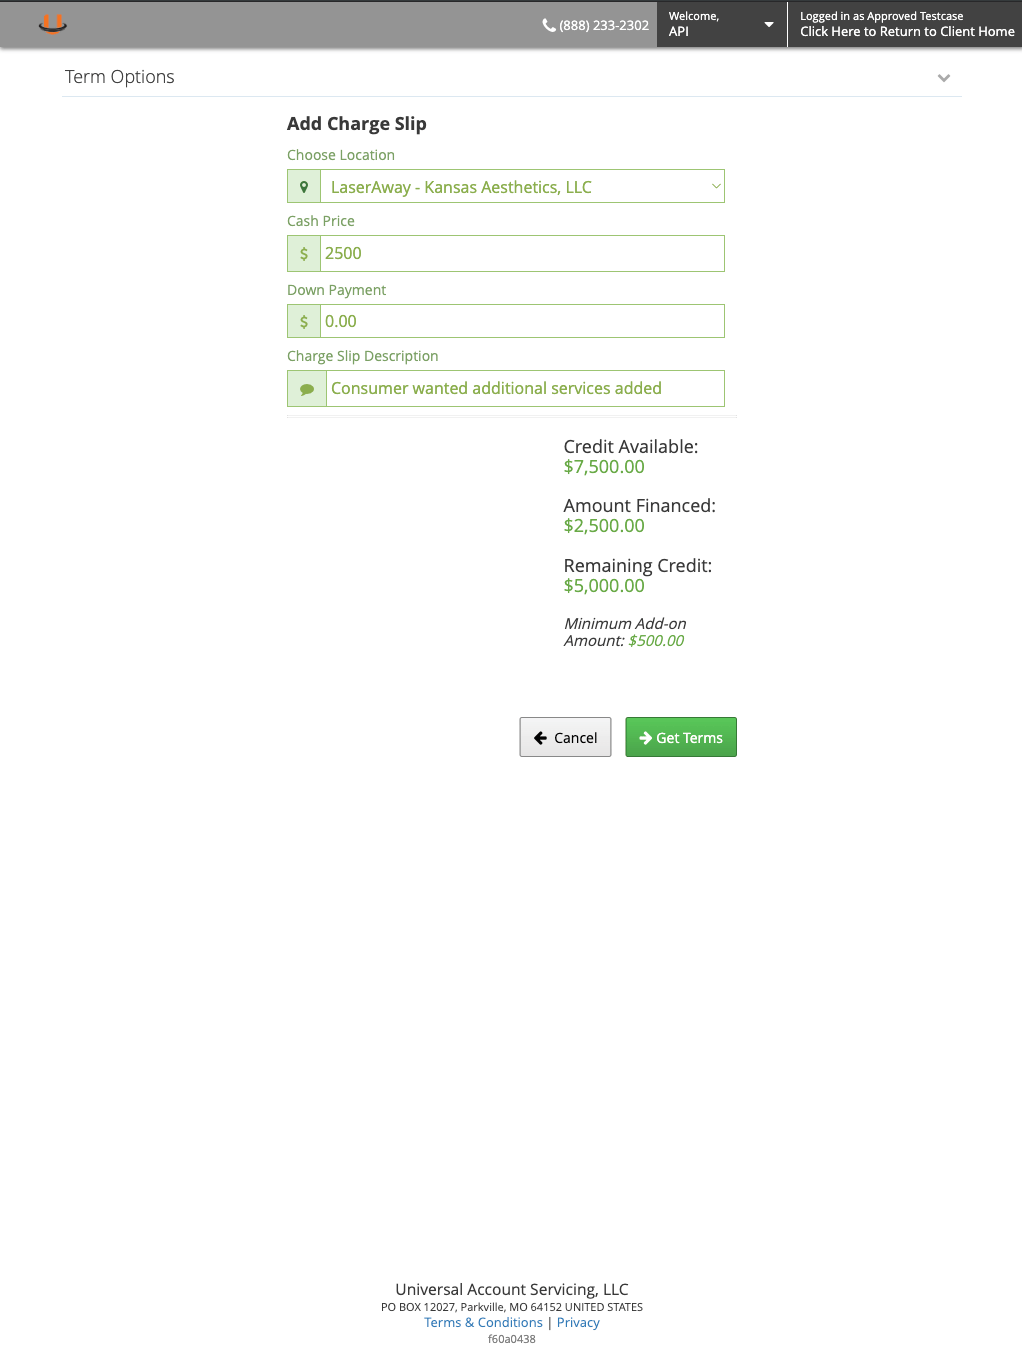
Enter in Charge Slip Details
3
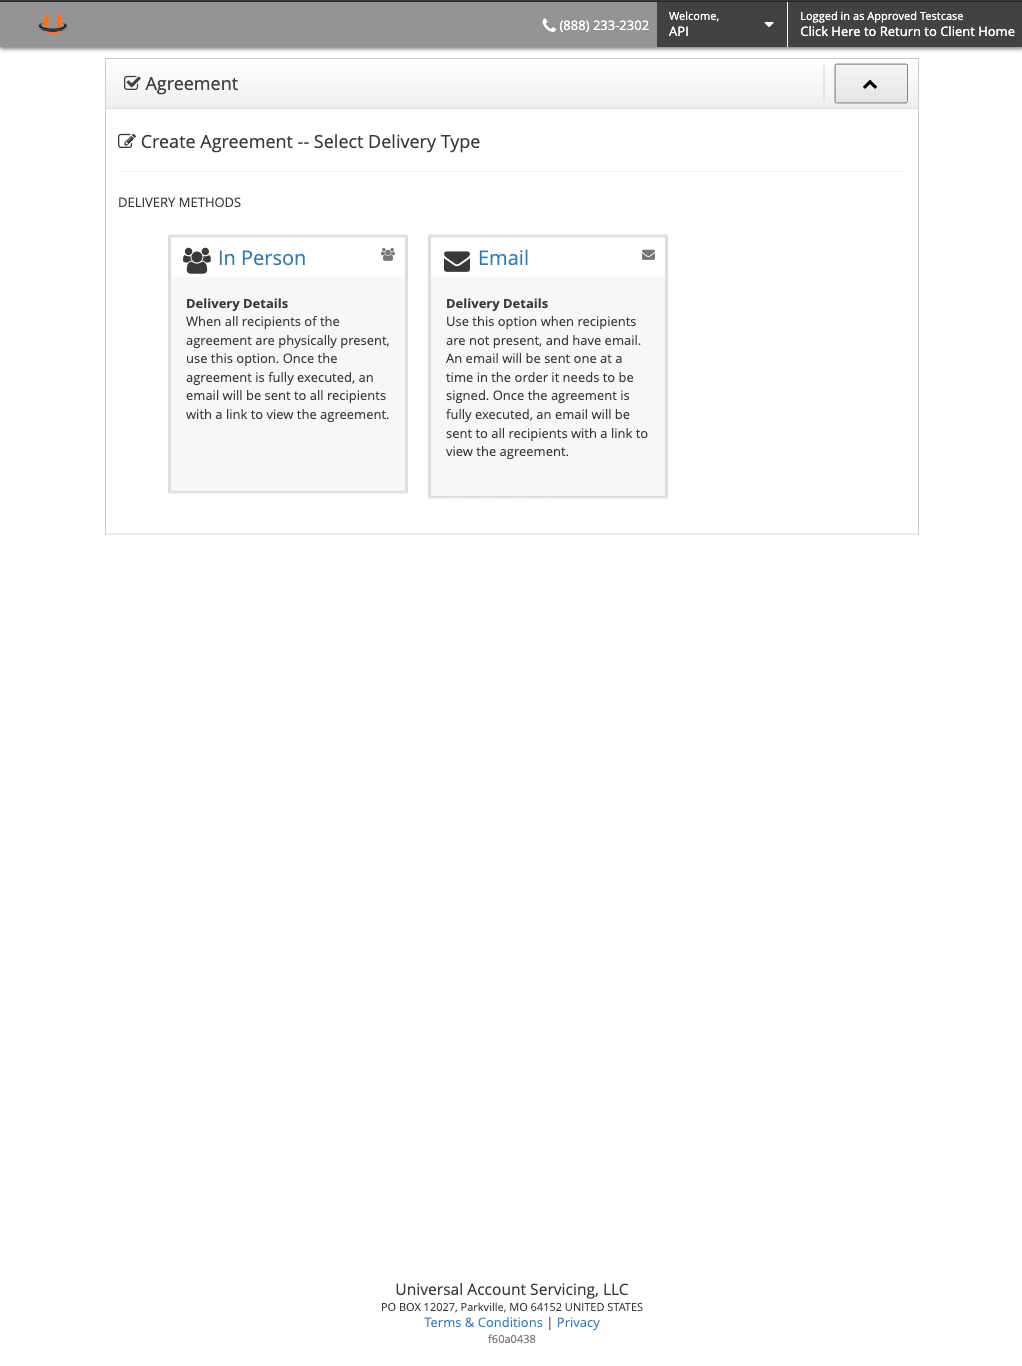
Select Create Agreement Type
4
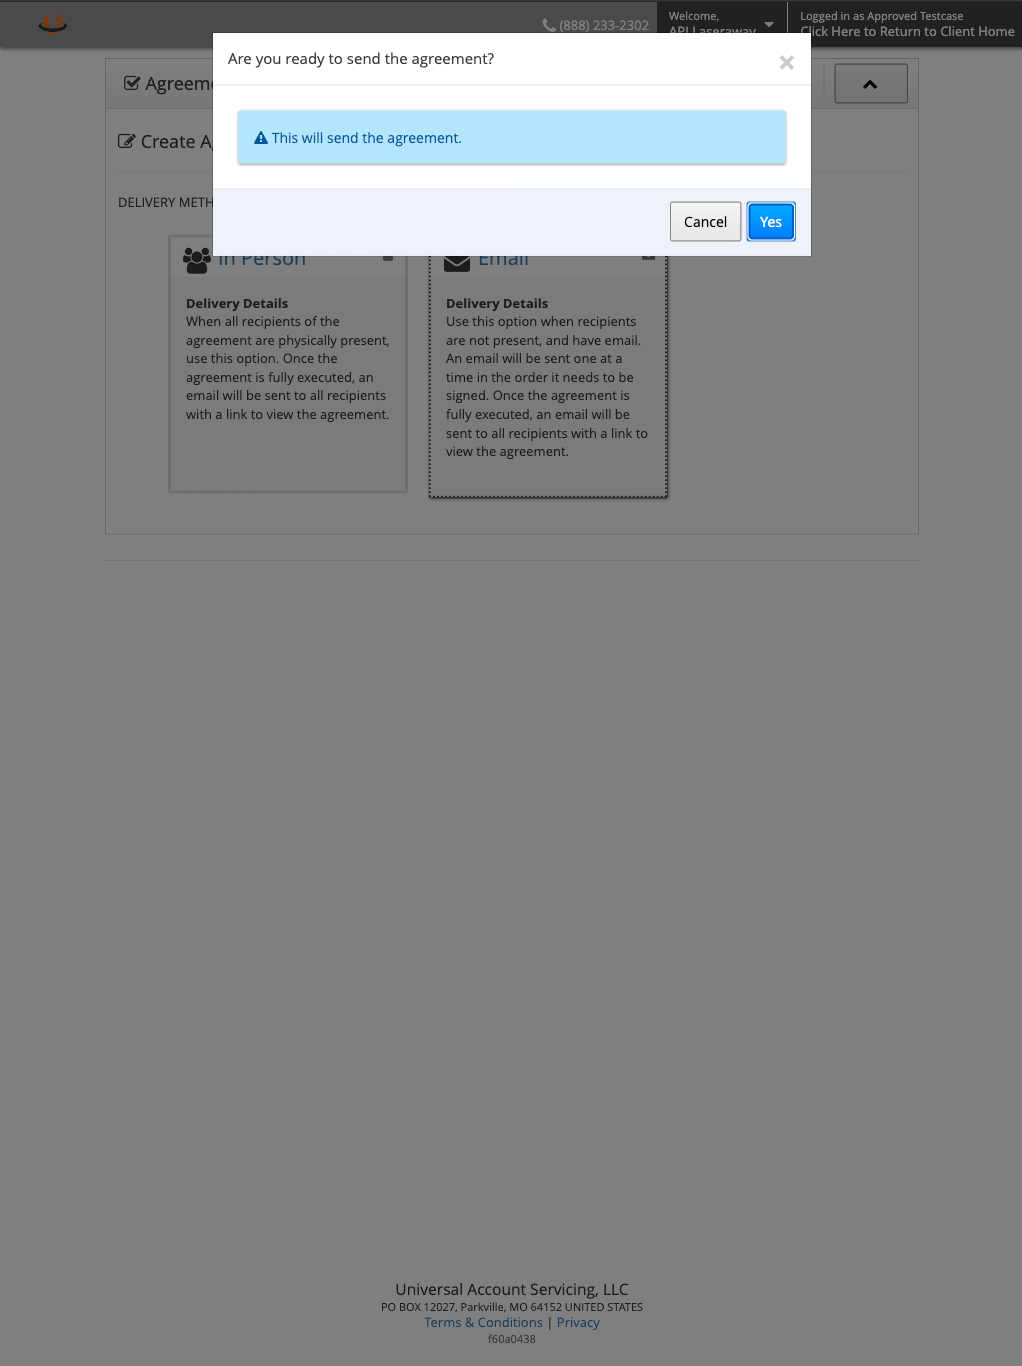
Send Agreement Confirmation
5
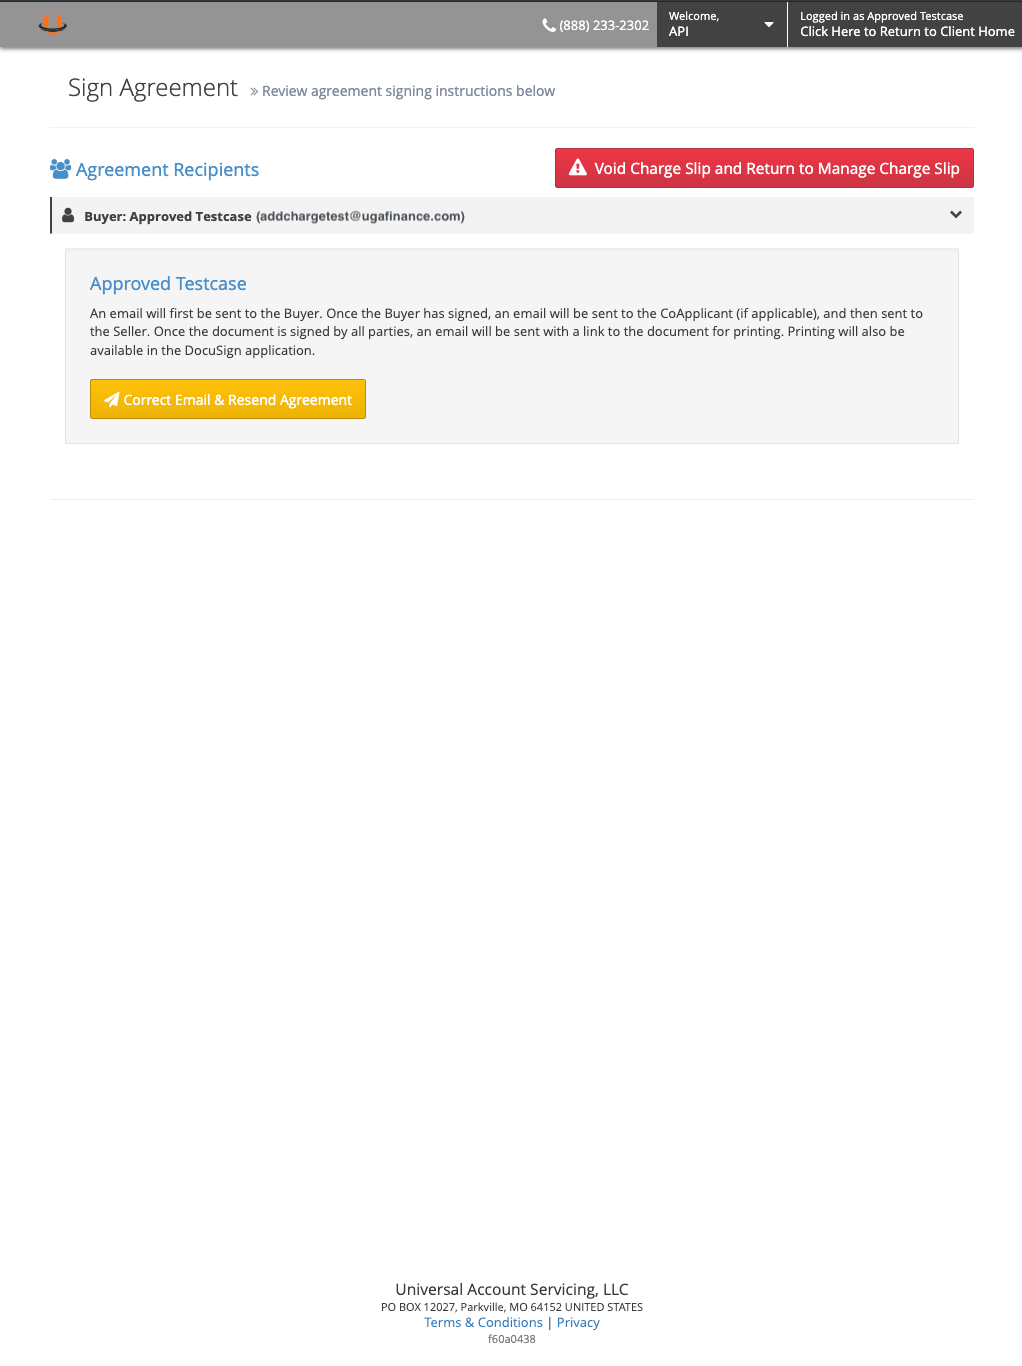
Agreement Confirmation
Consumer Reviews and Confirms New Charge
When a Merchant adds a charge to a Consumer’s account, the Consumer is responsible for reviewing and confirming these changes.1
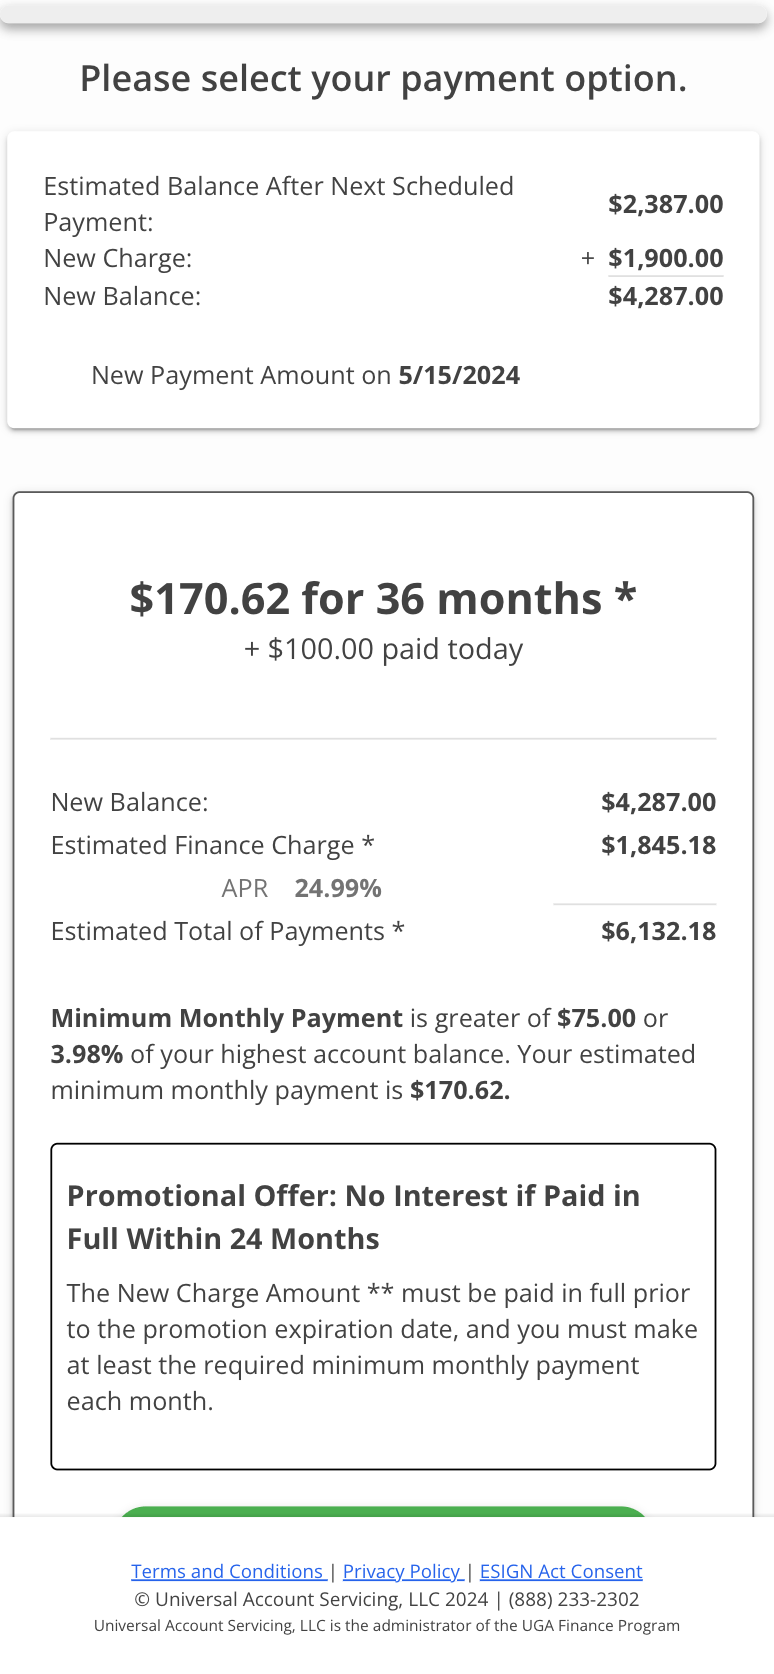
Select Payment Option
2
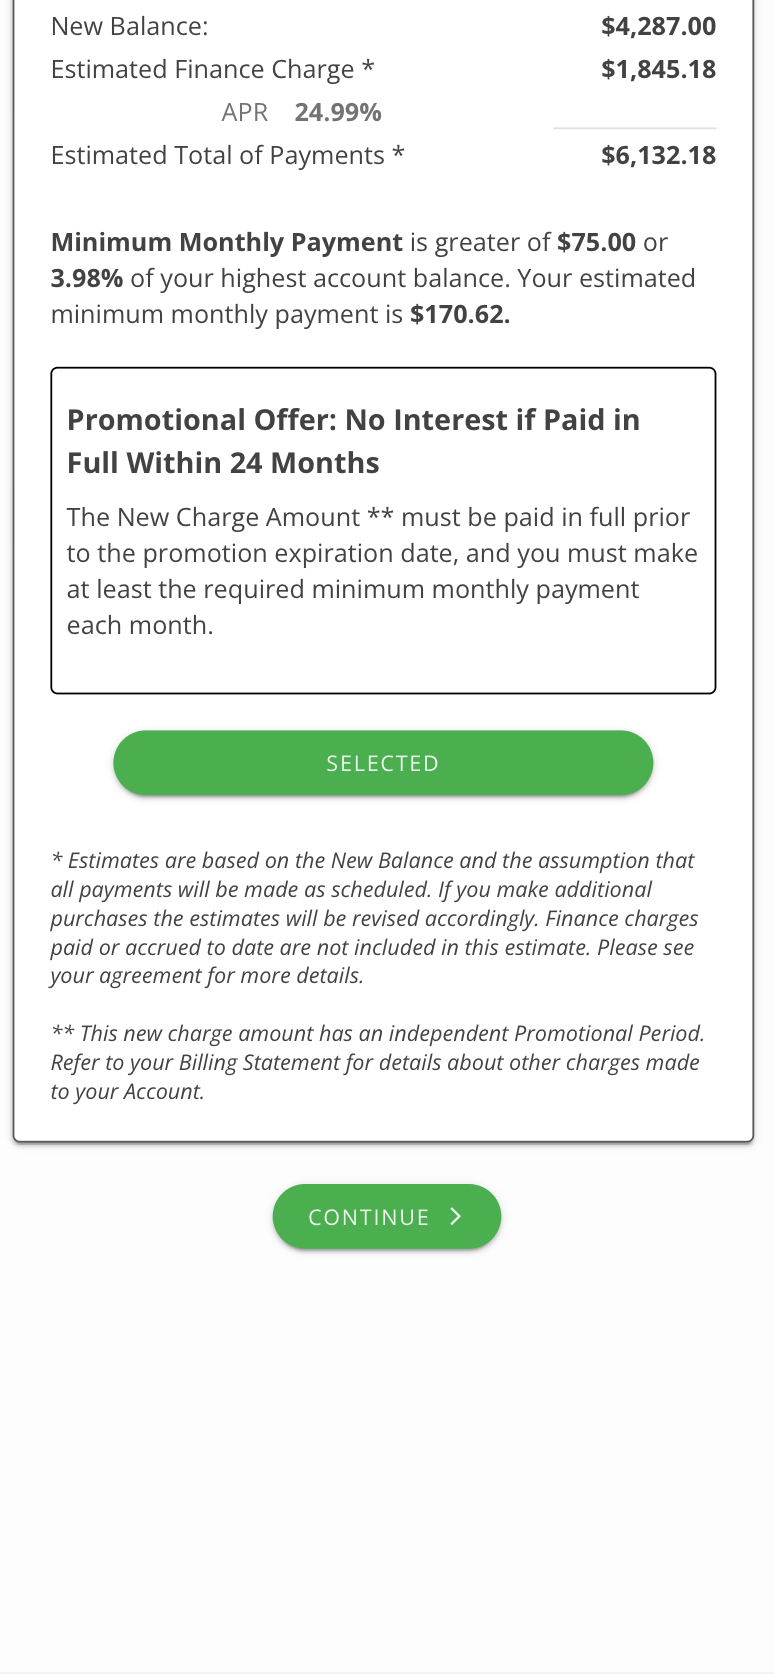
Confirm & Continue
3
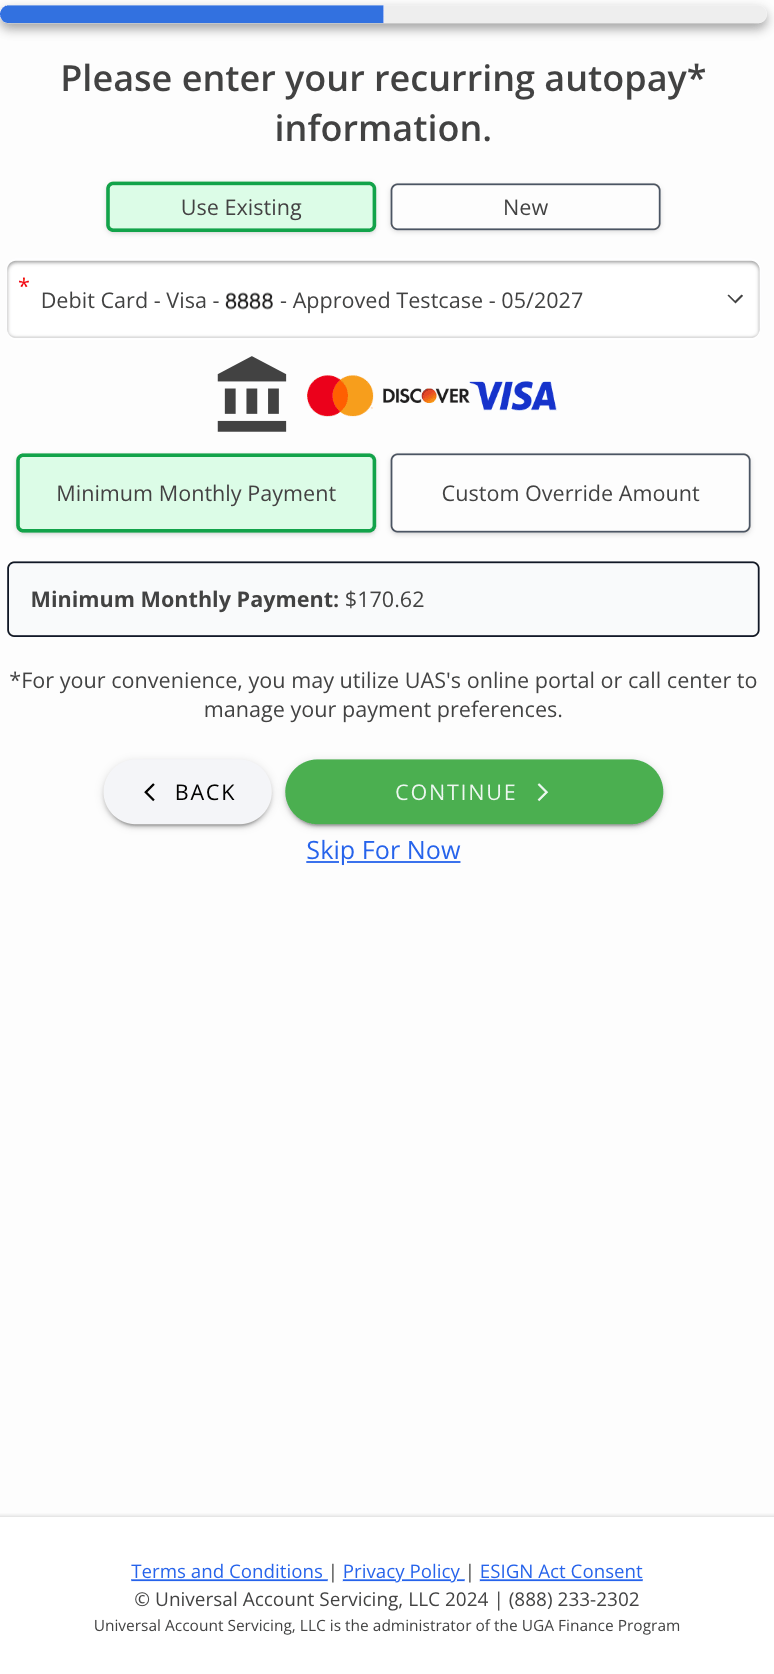
Confirm Autopay
4
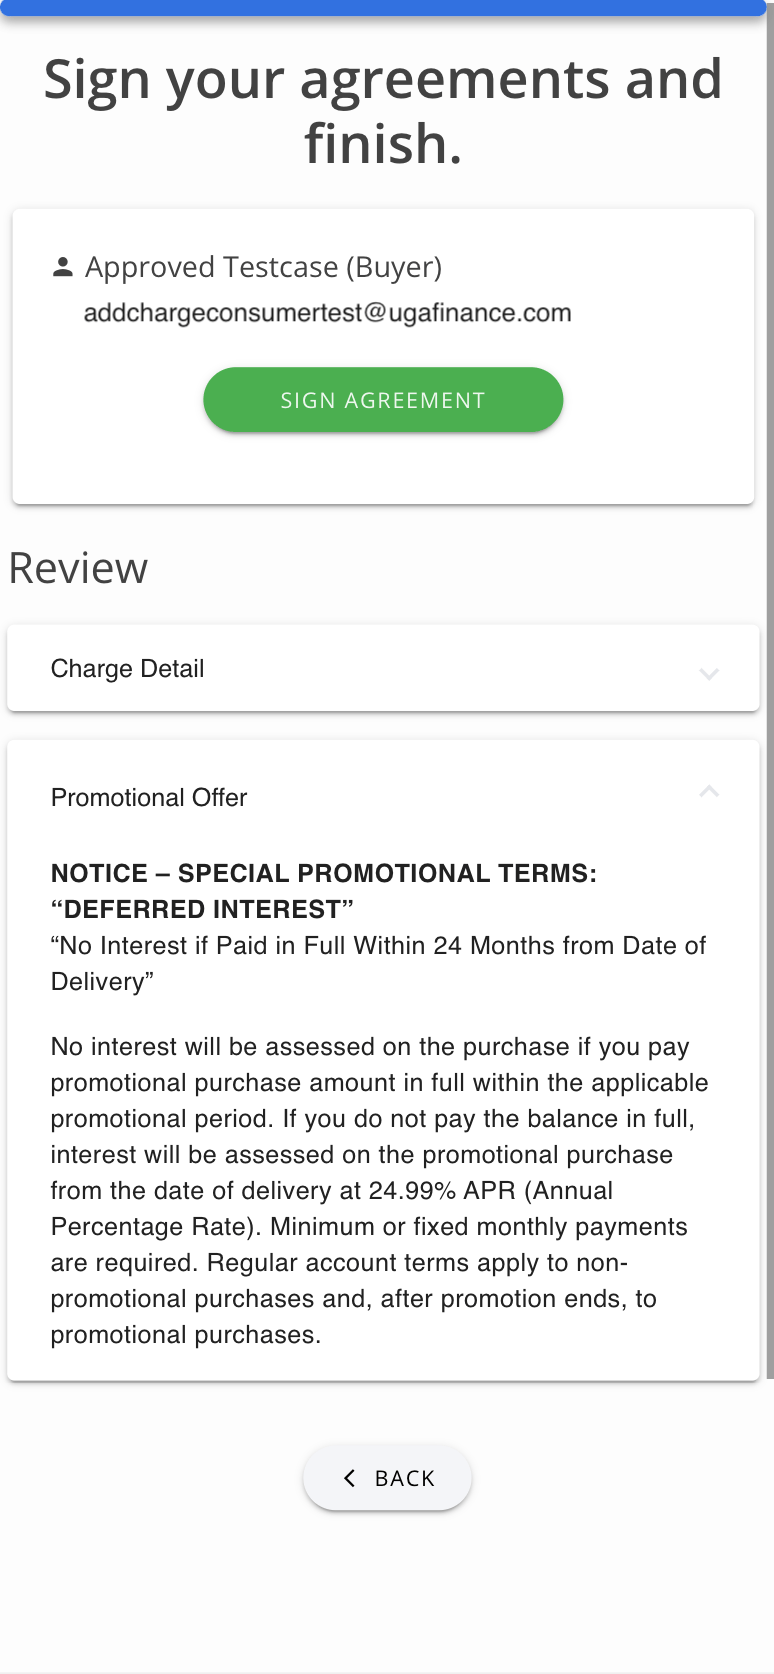
Review & Sign
5
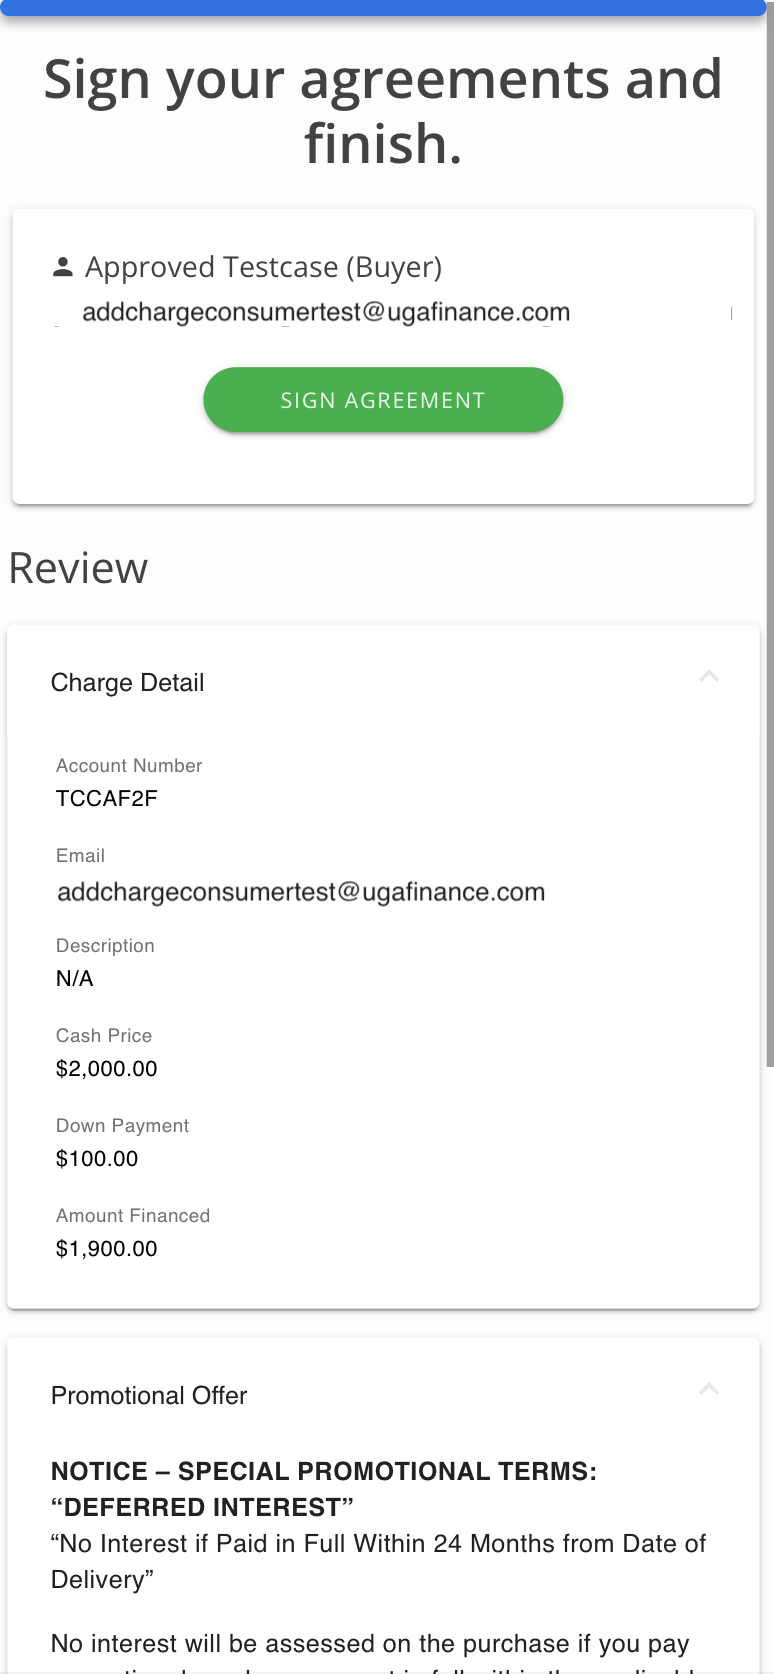
Review & Sign - Click “Review” to Expand Charge Details
6
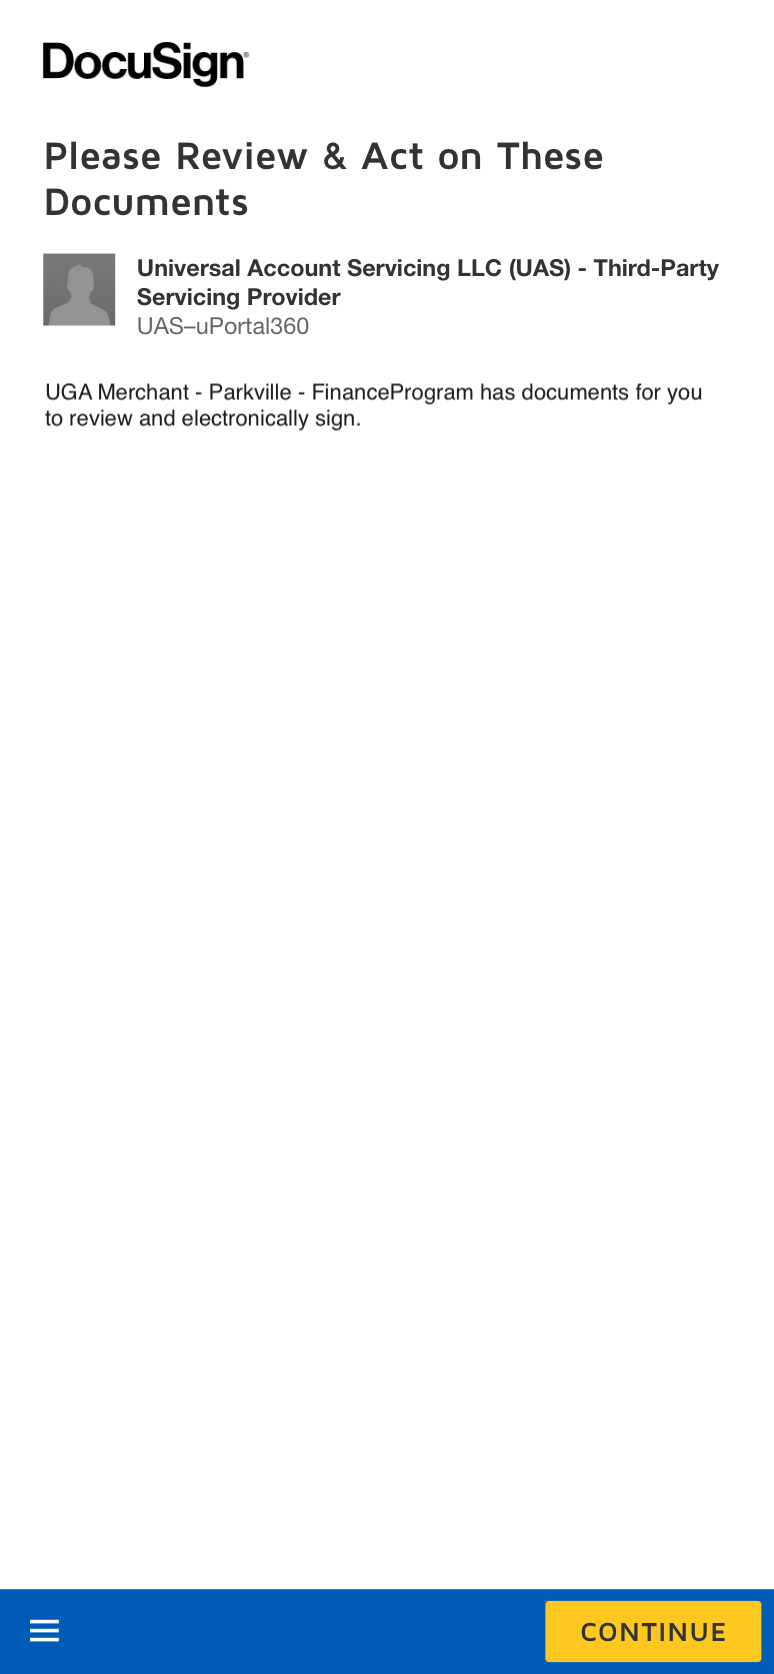
Sign Using DocuSign
7
Review Agreement & Sign
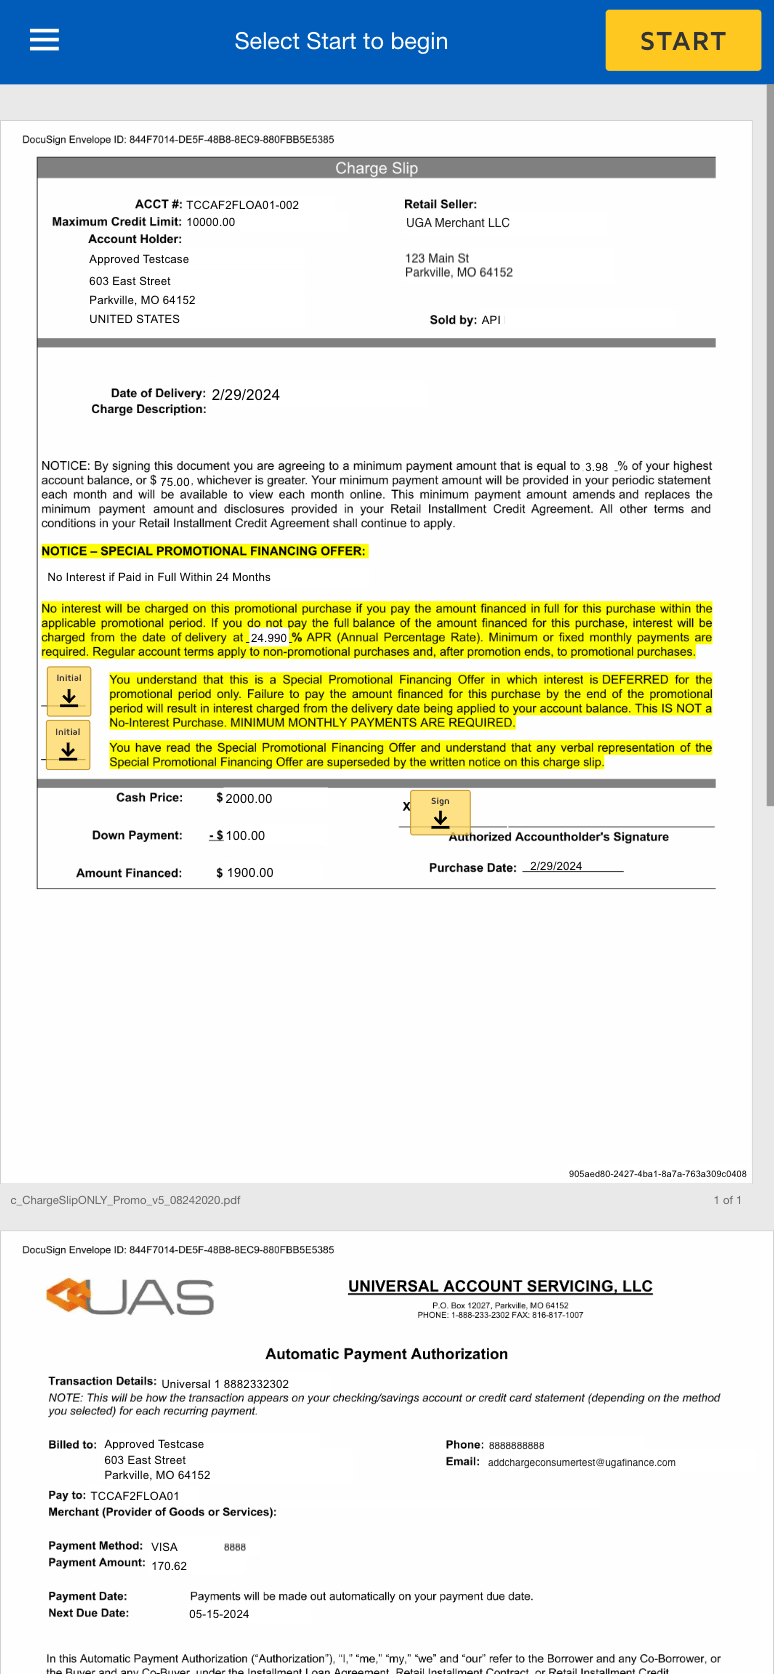
8
Finish Signing
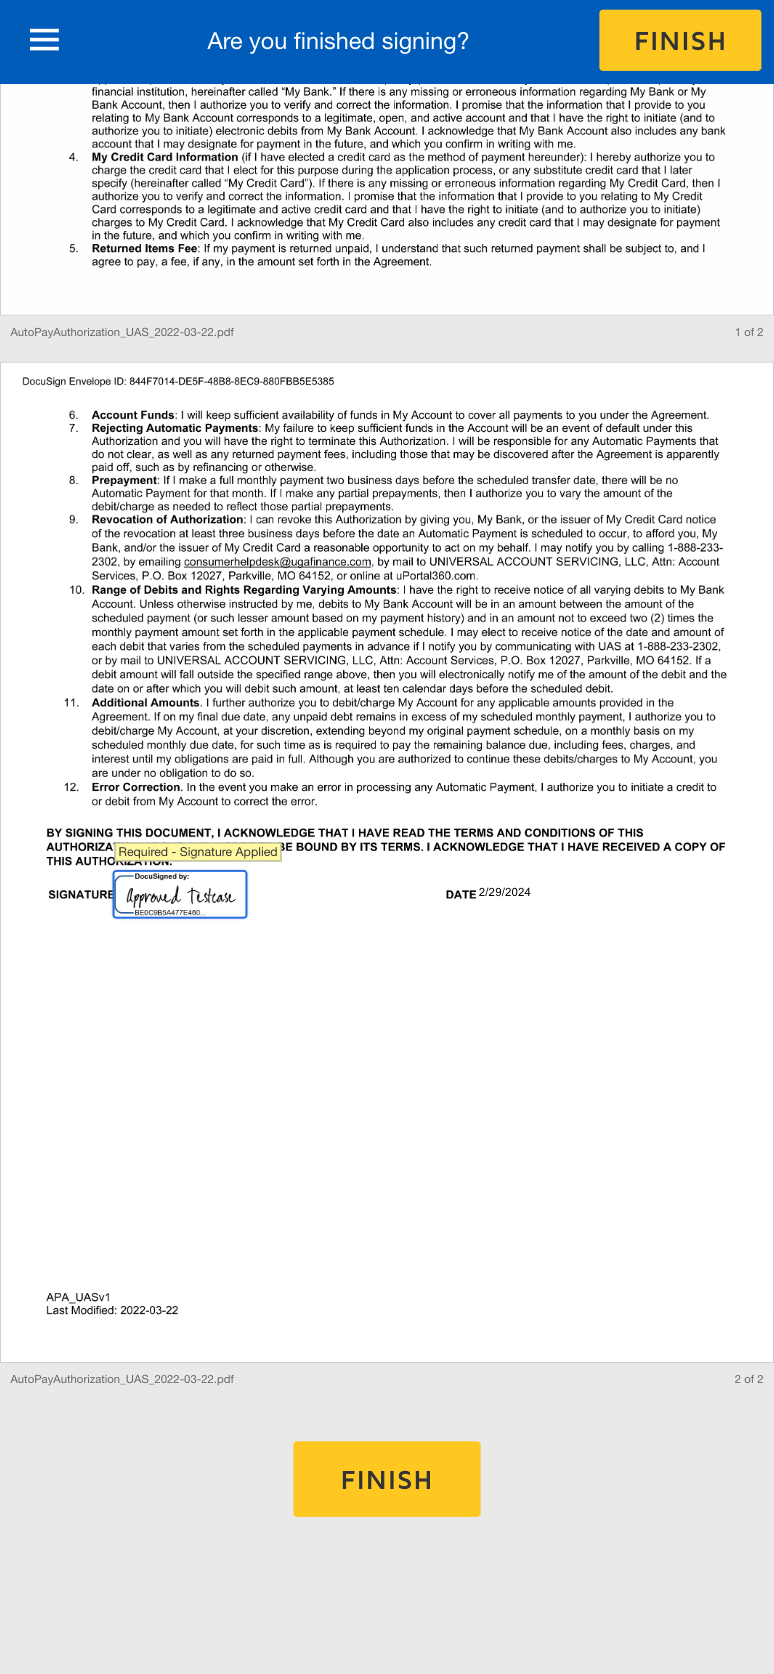
9
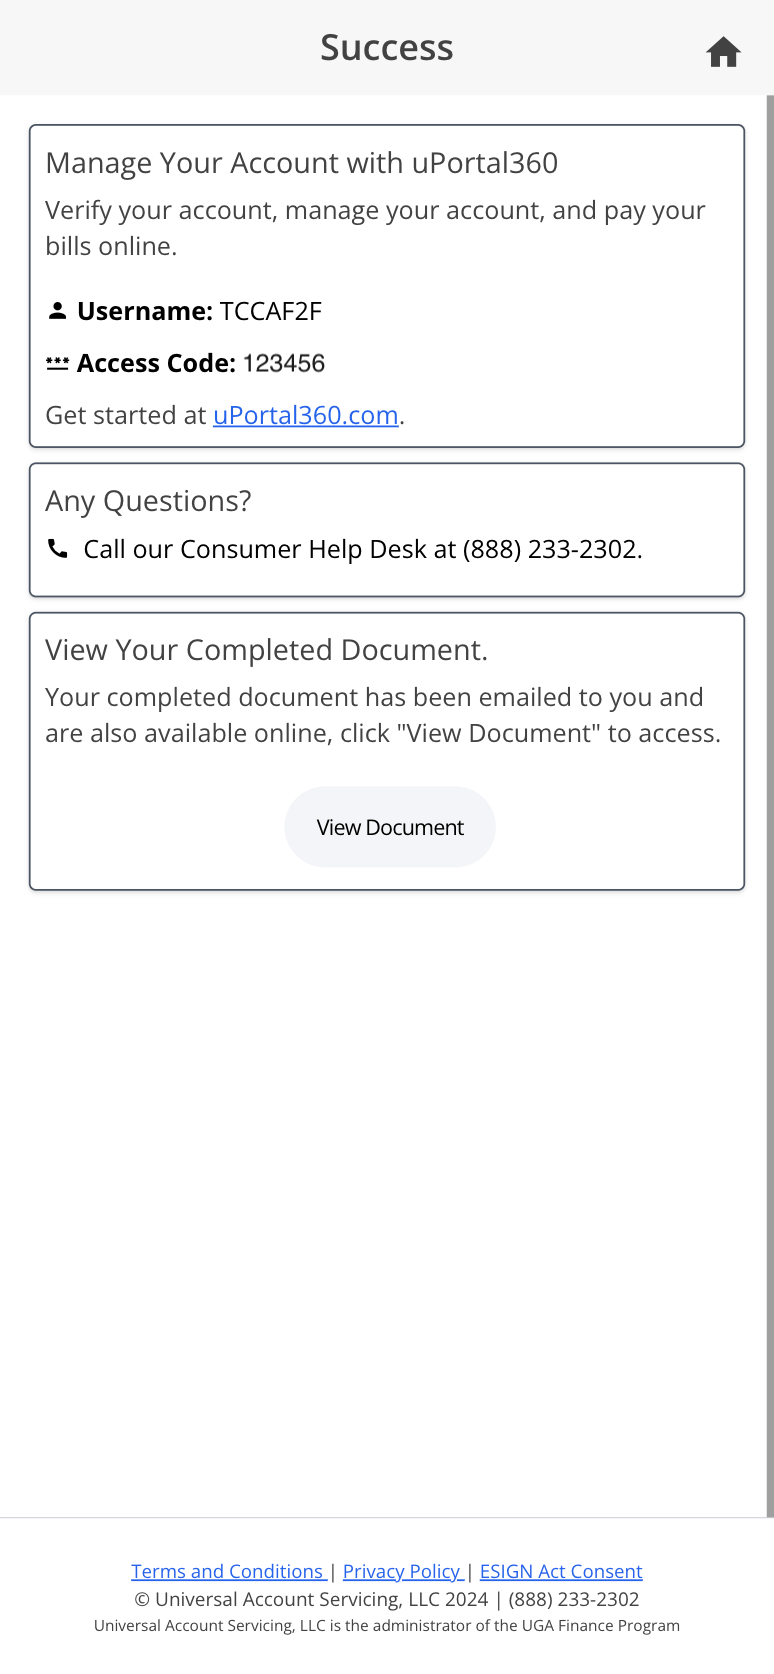
Confirmation Screen